本篇内容会涉及Blender和Blensor两个相似度极高的名称,所以使用不同的字体颜色以作区分,便于阅读
Blensor的官网网址:https://www.blensor.org/,官网也有一些教程,但不全面
我对Blensor的了解最初来自这两篇文章,在此也感谢这两篇文章的作者:
在 blensor 中仿真 TOF 激光雷达扫描得到 PCD 数据
这两篇文章讲解了Blensor的一些基础用法,所以一些基础操作这里就不额外写了,本篇内容主要记录一些我自己的理解。
首先,Blensor和Blender,这两个软件虽然名字图标界面一模一样,但其实互不干涉也互不依赖,Blensor是在Blender源码基础上再开发而来,所以使用Blensor前不需要安装Blender。Blensor最新版本基于Blender的 2.72 版本,而现在Blender最新版本是 3.2,所以使用Blender可以打开Blensor保存的文件,但使用Blensor打开Blender保存的文件就会出现问题。
Blensor基于的Blender版本比较老,但界面还是有较高的相似度,所以如果对Blensor的界面不熟悉,可以先从Blender界面开始学习,也可以在官网下载 2.7 版本的Blender,那界面就完全一样了。
前文提到的两篇文章都列出了扫描的脚本代码,我在他们二位代码基础上作了一些修改,主要实现了文件名根据当前时间生成,文件后缀直接就是.pcd,这样就省去了修改文件名的步骤
import bpy
from numpy import arange
from bpy import data as D
from bpy import context as C
from mathutils import *
import blensor
import datetime
import os

"""clear all scanning datas  """
for item in bpy.data.objects:
    if item.type == 'MESH' and item.name.startswith('Scan'):
        bpy.data.objects.remove(item)

"""clear the scanning in view windows and start newly scan"""
bpy.ops.blensor.delete_scans()
bpy.ops.blensor.scan()

"""Check if the directory exists, create it if it does not exist"""
dir_path = "D:\BlensorScannedFiles"
if not os.path.exists(dir_path):
    os.makedirs(dir_path)

"""Create a file with the current time as the file name"""
now = datetime.datetime.now()
filename = dir_path + "\" + now.strftime('%Y-%m-%d_%H-%M-%S') + '.pcd'
f = open(filename, "w")

i = 0  # Store the number of points in the point cloud
for item in bpy.data.objects:
    if item.type == 'MESH' and item.name.startswith('Scan'):
        print('write once')
        for sp in item.data.vertices:
            str = '%#5.3f\t%#5.3f\t%#5.3f \n' % (sp.co[0], sp.co[1], sp.co[2])
            i = i + 1
            f.write(str)
f.close()
f = open(filename, "r+")
new_data = (
        "# .PCD v0.7 - Point Cloud Data file format\nVERSION 0.7\nFIELDS x y z\nSIZE 4 4 4\nTYPE F F F\nCOUNT 1 1 1\nWIDTH %d\nHEIGHT 1\nVIEWPOINT 0 0 0 1 0 0 0\nPOINTS %d\nDATA ascii\n" % (
    i, i))
old = f.read()
f.seek(0)
f.write(new_data)
f.write(old)
用这个代码确实可以实现导出 pcd 文件,但导出的文件没有颜色信息,所以我还是想办法修复了 Blensor 本身导出文件的错误
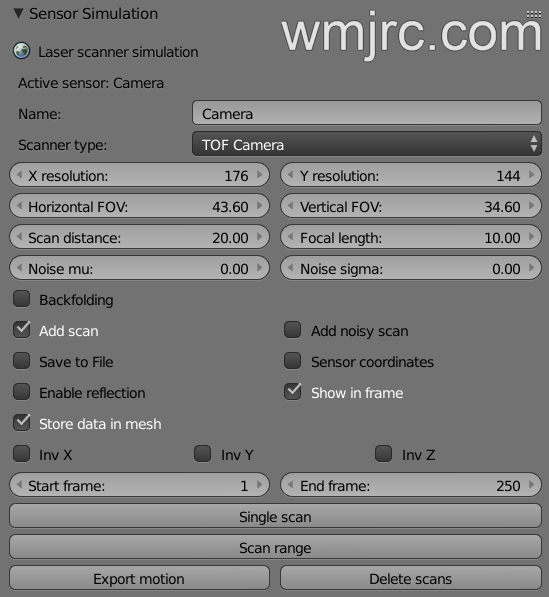
如果想扫描多个位置,再拼接成整体,就必须把 Sensor coordinates 这个选项取消勾选,否则每次扫描都会把相机位置当做原点,扫描出的结果拼接不到一起
暂时写到这里


